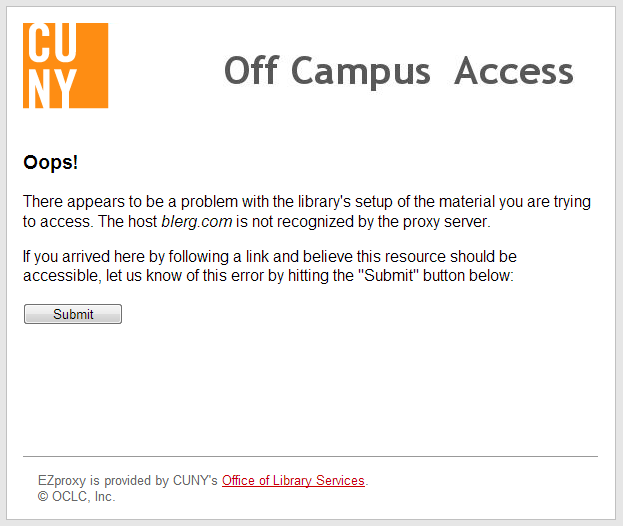
Back in March, my colleague enlisted me to help him roll out mobile-friendly interfaces for all centrally-hosted EZproxy instances. (My office provides support for all 21 libraries in CUNY. Half of the libraries host their own proxy servers while the others rely on us to host and maintain their instances.) While I was at it, I decided to spruce it up a little bit and make it so that users can send error reports if they reach needhost.htm:

It collects information in hidden input fields so all the user sees is a “Submit” button. This is done with a Google Form and some JavaScript. To implement similar functionality for your EZproxy server:
- Create a Google Form with 4 fields: referring URL, user agent, requested URL, and requested host. (Don’t spend too much time picking a template: no one will see this form since we’ll be embedding it into EZproxy.)
- Create a new spreadsheet that will save the responses (by clicking on the “Choose response destination” button in the toolbar) and click on the “View live form” button.
- Right-click and view the source code of the form. Find the following items:
<form>tag
note the URL that is its “action” parameter (in the form ofhttps://docs.google.com/forms/d/[FORM_ID]/formResponse, where[FORM_ID]is a long string of characters)<input>elements
note the name of each (in the form ofentry.[xxxxxx], where[xxxxxx]is a string of numeric characters)
- In your EZproxy
docsdirectory, editneedhost.htmand insert the following into the body of the page (replacing[FORM_ID]andentry.[xxxxxx]with the names from your form):
1
2
3
4
5
6
7
8
9
10
11
12
13
14
15
16
17
18
19
20
21
22
<h3>Oops!</h3>
<p>There appears to be a problem with the library's setup of the material you are trying to access. The host <em>^H</em> is not recognized by the proxy server.</p>
<p>If you arrived here by following a link and believe this resource should be accessible, let us know of this error by hitting the "Submit" button below:</p>
<script type="text/javascript">var submitted=false;</script>
<iframe id="hidden_iframe" style="display: none;" name="hidden_iframe"></iframe></pre>
<form id="needhost_form" action="https://docs.google.com/forms/d/[FORM_ID]/formResponse" method="POST" target="hidden_iframe">
	<!-- Below: Referring URL -->
	<input dir="auto" name="entry.[refurl]" type="hidden" value="" />
	<!-- Below: User Agent -->
	<input dir="auto" name="entry.[usragt]" type="hidden" value="" />
	<!-- Below: Requested URL -->
	<input dir="auto" name="entry.[requrl]" type="hidden" value="^V" />
	<!-- Below: Requested Host -->
	<input dir="auto" name="entry.[reqhst]" type="hidden" value="^H" />
	<script>
		document.forms["needhost_form"]["entry.[refurl]"].value = document.referrer;	// referring URL
		document.forms["needhost_form"]["entry.[usragt]"].value = navigator.userAgent;	// user agent
	</script>
	<input name="draftResponse" type="hidden" value="[]" />
	<input name="pageHistory" type="hidden" value="0" />
	<input id="submit_btn" name="submit" type="submit" value="Submit" />
</form>
Note the <script> and <iframe> tags in the code. What are they?
- Lines 4-6
- Upon hitting the “Submit” button in a Google Form, users are taken to a Google confirmation page. We want the user to stay on our site so we have to force this behavior on the EZproxy server.
- By creating a Boolean variable (
var submitted=false;, line 4) whose value will change upon the form submit (<form [...] onsubmit="submitted=true;">, line 6) and trigger a script that will change the window’s location (<iframe [...] onload="if(submitted) {window.location='public/needhost_submit.html';_">, line 5) to a page that you will have created and populated with a nice message, assuring the user the issue will be addressed posthaste.
- Lines 15-18
- We fill two of the
<input>elements with data we grab from the browser: referring URL (line 16) and user agent (line 17).
- We fill two of the
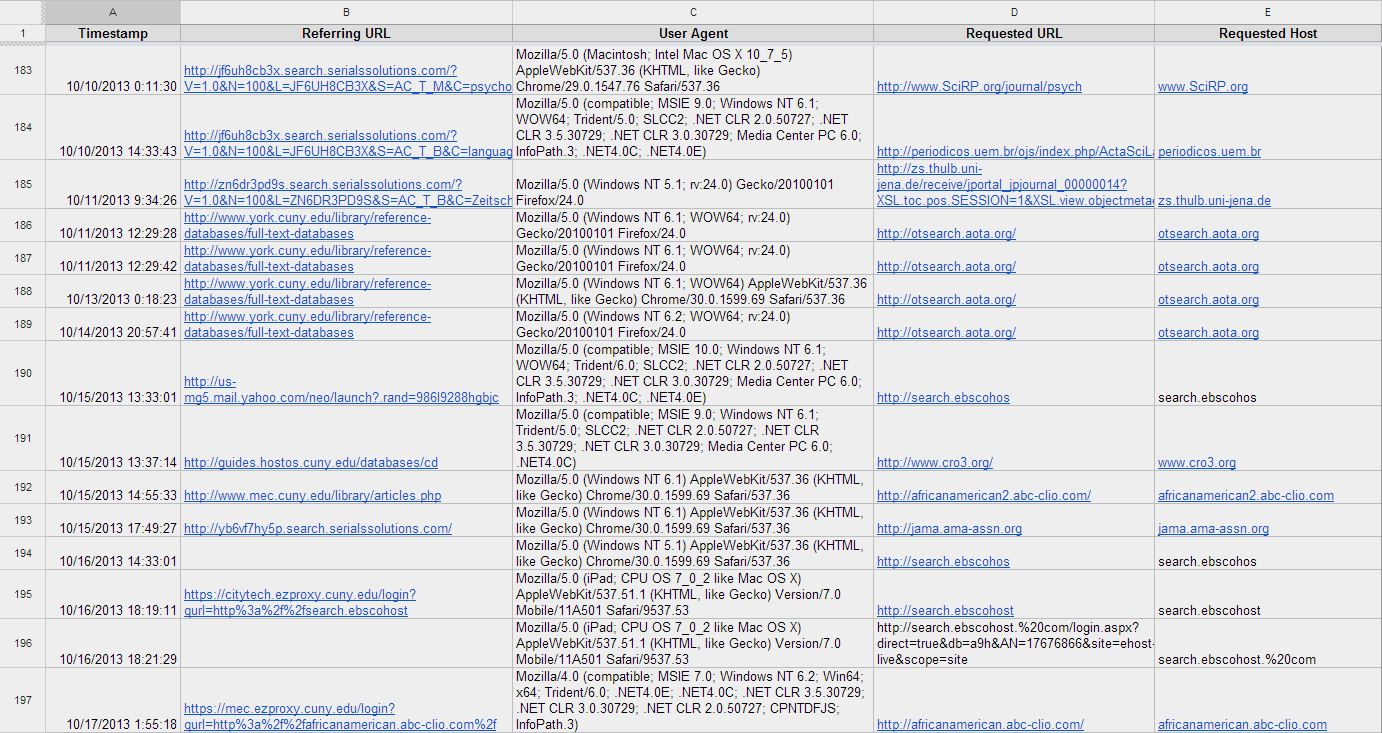
Et voilà! You now have EZproxy error reports, submitted by users trying to access actual resources, in a spreadsheet in your Google Drive account:

By default, you do not get email notifications when a form is submitted. You can turn on this functionality in the Google Spreadsheet but all it will do is inform you when a user has submitted the form, without actually providing you with the form data in the email.
To overcome this, we’ll create a script that will send the results to you by email as soon as a user submits the form. In the response spreadsheet, go to Tools > Script editor > Blank Project and paste the following code into the editor (replacing placeholder variable values with your own):
1
2
3
4
5
6
7
8
9
10
11
12
13
14
15
16
17
18
19
20
21
22
23
24
25
26
27
function sendFormByEmail(e) {
	var emailSubject = "Request to add host to EZproxy config.txt";
	// Set with your email address or a comma-separated list of email addresses.
	var yourEmail = "[EMAIL_ADDRESS]";
	// Set with your spreadsheet's key, found in the URL when viewing your spreadsheet.
	var docKey = "[FORM_ID]";
	// If you want the script to auto send to all of the spreadsheet's editors, set this value as 1.
	// Otherwise set to 0 and it will send to the yourEmail values.
	var useEditors = 0;
	if (useEditors) {
		var editors = DriveApp.getFileById(docKey).getEditors();
		if (editors) {
			var notify = editors.join(',');
		} else var notify = yourEmail;
	} else {
		var notify = yourEmail;
	}
	// The variable e holds all the submission values in an array.
	// Loop through the array and append values to the body.
	var s = SpreadsheetApp.getActive().getSheetByName("Form Responses");
	var headers = s.getRange(1,1,1,s.getLastColumn()).getValues()[0];
	var message = "";
	for(var i in headers) {
		message += headers[i] + ' = '+ e.namedValues[headers[i]].toString() + '\n\n';
	}
	MailApp.sendEmail(notify, emailSubject, message);
}
Click File > Save and give the project a name (such as needhost_notify). Go to Resources > Current project's triggers. Click “No triggers set up. Click here to add one now.” to add a trigger. Ensure the following values are selected in the drop-down menus: sendFormByEmail, From spreadsheet, On form submit. Click “Save.”
A message will be shown to authorize the script; click “Continue.” Read the terms and click “Accept.” It will approve the authorization for the trigger and bring you back to the code editor. You can now close the editor and go back to your spreadsheet because you’re all set!

You should now have a form, embedded in your EZproxy’s needhost.htm file, that users can submit to self-report problems accessing resources. Their responses will be logged in a spreadsheet in your Google Drive account and emailed to you upon submission. Go forth and troubleshoot!
Resources